Like most carpers, I use braid for my marker float set up. It’s far more responsive than mono, has negligible stretch and tells me more or less exactly what the lake bed in front of me presents. To work effectively, give me good casting range and reduce friction, the spool must be properly filled. However, braid alone in sufficient quantities to fill a deep spool on a ‘big pit’ type reel would be prohibitively expensive, so how can you make sure that you put on just the right amount and keep costs down?
I suppose many anglers may have fallen into the ‘chance it’ trap and taken off a hundred metres or more of monofilament from their current fishing spool, leaving enough to serve as ‘backing’ line and then put braid straight over the top hoping it will be enough to either fill the spool correctly, or give them enough to cast with. If you have tried and got away with it, fair play to you, you’re a better judge than me!
When I’m going to prepare a spool for my marker reel, the first thing I do is select a decent, specifically designed braid; today I’ll be using ‘Kinetic’ marker braid from Gardner Tackle. It retails at around £29.99 for a 250m spool, has a diameter of just 0.32mm, and the 8-carrier construction gives a rounder profile and smoother finish. I know it will cast properly, transmit the information I need directly to the rod tip, and is tough enough and sufficiently abrasion resistant to withstand any conditions I might find.
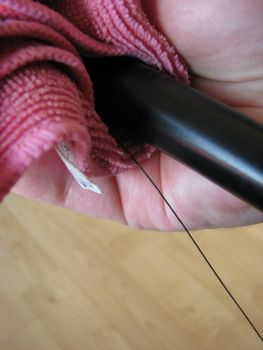
Before I put the braid on the reel spool, I like to soak it for at least 24 hours to give it chance to ‘relax’, absorb some water, become more flexible and therefore easier to handle. A word of warning though; wet braid can make a real mess of your fingers, ALWAYS spool it on through a damp cloth to protect your hands as the narrow diameter makes it almost as effective as cheese wire through unguarded flesh! Even though it’s a 250m spool, I prefer to put most it on, mainly because I would never be able to guess when I have enough, but mainly because I don’t expect to lose any (hopefully!) and I always forget where I’ve left the braid when I want to replace it! I try to use plenty of backing mono to help the braid ‘bed’ properly.
 The easiest way to correctly fill a spool with braid is to use an identical spare spool. Attach the braid to the empty spare spool using your preferred knot; some anglers will use a few turns of nylon first to help ‘bed’ the braid and prevent it slipping under pressure, but that is better suited to using braid as a mainline and isn’t essential in this case. Once the braid is attached, then put the spool on the reel, and wind on through a damp cloth as previously mentioned. Do this gently, maintaining a steady pressure to ensure it lies properly and doesn’t trap or pinch coils to cause knots or damage the braid.
Once the end of the braid is reached and the spool is part filled, then, using a double grinner knot, tie some mono to the braid (obviously use enough to fill the remainder of the spool!) and continue to wind on until the spool is almost full. You should aim to finish approximately 1-2mm below the lip. When complete, remove the spool and set aside. Now comes the clever part; fix the empty spool you intend to use on your marker reel into place and tie the end of the trailing end of the mono now on the SPARE spool to the marker spool. Using steady pressure, again through the damp cloth, wind on until all the monofilament is on the marker reel. This leaves the braid to sit on top of the mono which now acts as a backing line and ensures the reel is correctly filled and protected.
Carefully put on a few turns of braid over the top of the mono. Check that the braid sits properly, and then continue to fill the spool. Reaching the end of the braid should leave the marker spool filled to capacity and ready to use. Leaving a gap of a 1-2mm below the lip helps to guard against wind knots or tangles as the braid spills off during the cast.
Hopefully, loading braid this way will make it easier to judge how much you need and prevent expensive mistakes. Gardner ‘Kinetic’ marker braid is available at all good stockists or online at www.gardnertackle.co.uk
Clint Walker, December 2010


